Sunday, December 30, 2012

Cozy Cuddle Scarf

Winter always gets me in a scarf making mood! Here's my newest scarf creation. A scarf made from Mar Bella Cuddle by Shannon Fabrics.


1. Start with a 1/2 yard of your favorite Cuddle by Shannon.

2. With right sides together, sew the entire length of the fabric.


3. Move the seam to the center of the back of the scarf and sew the end closed. Sew the seam open to eliminate bulk.

4. Repeat step 3 on the other end, leaving a small opening to turn the scarf through. Back stitch to reinforce the opening.

5. Pull scarf through opening to that it's right side out.


6. Whip stitch opening closed or top stitch to catch opening.

7. Wear and enjoy!!!

Sunday, December 9, 2012

Sassy Yarn Scarf


These Infinity Yarn Scarves are the perfect accessory to complete an outfit and they are 
so simple to make! Plus, they make wonderful gifts for any occasion.

Here's how to make one:

1. Choose 8-12 yarns of various types that coordinate. Use all different material blends, designs, weights and thicknesses.

2. Decide the length of your scarf, by making the double loop with one of your yarns and deciding where you would like it to lay. (Mine was about 2 yards long)

3. Cut the length you need and tie a knot.

4. Continue adding your yarns in any order you find pleasing. Adding multiple loops of some yarns and single loop of others. (You may need to play with the outcomes until you find one that suits you.)

5. Tie 2-4 pieces of yard around all of the thickness to help keep the yarns from tangling and to help the scarf lay correctly.

6. Loop twice around neck and enjoy!


Friday, September 7, 2012

A Twist on T-Shirt Quilts

I love making T-Shirt Quilts! They are the best way to preserve old memories! 
But what if you just want to display a few?????

Well, my husband came up with the answer to that! How about a wall hanging?


My husband reads and collects comic books and has received and bought many t-shirts over the years. He wanted a fun way to display some of his favorites that he no longer wears and
this was the perfect solution.

Here's how I did it!

Step 1 - Select Shirts - Shirts should be clean and in good condition.

Step 2 - Fusible Interfacing - Each shirt must be backed with non-woven fusible interfacing to prevent it from stretching. Buy enough fusible interfacing to make a 17" square for each T-shirt. I suggest Bosal 312 or Pellon 906F.

Step 3 - Fabric for Sashing/Border/Binding - Sashing strips form a decorative grid between each T-shirt block. Plan on 2" sashing strips (1 1/2" when finished) between the blocks, 2 1/2" strips (2" when finished) for the border, and additional fabric for the binding. Calculate the amount needed and be sure to wash it before you use it - you want to be sure that the color won’t run and that the fabric will not shrink after the quilt is finished.

Step 4 - Cutting Shirts - Separate the front of the shirt from the back. Make sure the shirt is smooth, iron if necessary. You want your shirt side to be larger than 15 inches square  - ideally larger than 17 inches to fit the interfacing.  After you apply the interfacing you will cut the shirt square to the desired size.

Step 5 - Fusing - Cut interfacing into 17" squares - one for each shirt. Don’t piece the interfacing, it will show through. Position the interfacing with the resin side down on the wrong side of the t-shirt, trying to center the design as much as possible. Follow the manufacturer’s instructions for fusing to the back of each T-shirt. Use a press cloth so you don’t get any glue on your iron.  Beware of wrinkles - once cool they won’t come out!

Step 6 - Cutting the Squares - This is where you cut your t-shirt square. Square up each fused shirt to 15".  Make sure you center the design and lettering - measure twice - cut once! Cut with scissors or rotary cutter.

Step 7 - Arranging - Lay out squares on the floor and arrange. Alternate light/dark, busy/not so busy. Make sure the blocks can be read from the desired direction.

Step 8 - Completing the Quilt Top - add sashing - Sashing strips are the horizontal strips between blocks. The horizontal strips should measure 15" in length x 2" wide. Cut enough sashing strips to add to all the t-shirts. Then sew horizontal strips to the bottom of each block, and add one addition strip to the top of the top block. Sew blocks together to form column.
After all the blocks are sewn into column, make long 2" sashing strips slightly longer than length of the  column. Sew the 2" sashing strips onto the vertical sides of the completed columns. Cut off excess fabric.  Press toward sashing.

Finish - Layer backing batting and quilt top. Baste or safety pin together. If you have some experience machine quilting you can quilt your quilt or you can tie it to hold the layers together. Bind your quilt and be sure to add a label.

*Original directions from www.goosetracks.com

Monday, August 6, 2012

Quick and Easy Baby Quilt

I love making baby quilts for friends and family! There is nothing better than welcoming a life into the world with something soft and handmade. However, sometimes time can get away from you.

I have recently found that panels can be a huge timesaver without taking away from the handmade look.

They can be quite impressive with the right quilting, borders, and binding accents. Plus they help you save time and money.

So the next time you realize that a baby is due any minute and you still haven't started a quilt, check out your local quilt shop or Joann Fabrics for a fun and cute baby panel to create a handmade quilt.

Sunday, August 5, 2012

Perfect Back for a Baby Quilt

If you have never tried backing a baby quilt in Minky/Cuddle/Fireside fabric, I highly recommend it!!!

I just finished a baby quilt for my first nephew and the directions said that I would need 3 1/2 yds of material for the back and that I would need to piece it.

I thought to myself, "Hmmm, there must be an easier way." And there was! I purchased a 60 inch wide Cuddle fabric and it required no piecing. Plus I only needed 1 2/3 yds instead. 
Talk about saving money!


So the moral of the story is, for baby quilts (and most likely any smaller throw) Minky/Cuddle/Fireside is super soft, cheaper in the long run, and requires no piecing.


Tuesday, July 10, 2012

Fabulous Photo Puzzle

As I was packing for our move I came across a puzzle tin that had been a Christmas gift a few years ago. As a surprise, my mom had a picture of my husband (then boyfriend) and I made into a puzzle. It was such a fun gift! Not only did we enjoy putting the puzzle together, but it was of us!

This idea got me thinking two different, exciting, thoughts!

1. You could take a picture of your quilts or craft masterpieces and have them made into puzzles! That way you could enjoy putting your work-of-art together over and over again and this time your family could help!

2. You could take pictures of your children, entire family, or favorite vacation destination and have them made into puzzles. Then your children could put together puzzles of themselves or places they have seen. Why put together a random landscape, when the landscape can be yours?


Just some creative thoughts! I know that I will totally be taking advantage of this more often as I travel with my husband, for projects in my classroom, and later in life, when we have children of our own.

Here are a list of websites I found that offer photo puzzles! Enjoy!

Monday, July 9, 2012

Moving A Sewing Room

My amazing husband and I just bought our first HOME!!!!
That huge change is what sparked this next quilter-on-the-go blog post. 


Moving a sewing room can be a daunting task, but Sterilite show-off storage can work miracles! Plus it is currently 50% off at Joann Fabrics! I stocked up and stowed away. All of my projects, stash, UFOs, and tools are safely stored in hard plastic containers, with snap-on lids, and transparent sides. It will make moving and organizing our new house a breeze. Plus, I can keep all of the items stored and find them easily whenever I have the time to get crafty! It's awesome!

Small: Perfect for UFOs

Medium: Perfect for tools
Large: Perfect for stash storage


Tuesday, June 19, 2012

Crock Pot Chicken for a Quilting Day

Nobody wants to be bothered with cooking a meal when you get a free day to sew.
Here is another tried and true crock pot recipe for a day of quilting!


Thursday, June 14, 2012

Flag Day Table Runner

Happy Flag Day Everyone! 
(And Happy Birthday Dad!!!)

Here is a wonderful video I found showing how to make a stunning American Flag Table Runner.


Wednesday, June 13, 2012

A Disney Idea

My husband and I just arrived back home after 10 days in...
Walt Disney World!!!


We had a blast and it was the perfect way to kick off our summer breaks!

Sunday, May 6, 2012

Scrap Basket Buster

My mom and I have been working on a fabulous scrappy quilt that is sure to put a dent in you scrap basket and a smile on your face.


This pattern is easy to read and fun to create. Mom and I simply took out our scrap baskets and started taking a stroll down memory lane. It's amazing what sort of memories different fabrics provoke.

Start with three sizes of squares. Trim into circles.

Place the largest circle on a solid background.

Continue by stitching the medium circle on top.

Finish with the smallest circle on top, leaving raw edges.


For all instructions and details, buy the pattern and your local quilt store or visit the


 Grab a friend and get going! This is a great project for friends, guilds or gatherings!

Sunday, April 22, 2012

My Favorite Poem


I read this poem in my Language Arts book when I was a Sophomore in High School. I wrote it down and presented it to my mom as a Mother's Day gift. It is my favorite poem and it brings me to tears every time I read it.

As the daughter of a quilter, I can promise you that the quilts you create and the time that you take will always be remembered and cherished. If you are are a mother, I urge you to teach your children about quilting and show them why it is important to you. The masterpieces you create will be living reminders of your love and dedication.

My Mother Pieced Quilts 
Teresa Paloma Acosta 

they were just meant as covers         
in winters         
as weapons         
against pounding january winds 
                
but it was just that every morning I awoke to these         
october ripened canvases                  
passed my hand across their cloth faces         
and began to wonder how you pieced         
all these together                  
these strips of gentle communion cotton and flannel             
nightgowns                  
wedding organdies         
dime store velvets
                  
how you shaped patterns square and oblong and round         
positioned                  
balanced         
then cemented them         
with your thread         
a steel needle         
a thimble  
               
how the thread darted in and out                  
galloping along the frayed edges, tucking them in         
as you did us at night                  
oh how you stretched and turned and re-arranged         
your michigan spring faded curtain pieces         
my father's santa fe work shirt                  
the summer denims, the tweed of fall
                  
in the evening you sat at your canvas                  
 ---our cracked linoleum floor -the drawing board         
me lounging on your arm                  
and you staking out the plan;                  
whether to put the lilac purple of eastel- against the red             
plaid of winter-going-                  
into-spring                  
whether to mix a yellow with blue and white and paint the         
corpus christi noon when my father held your hand         
whether to shape a five-point star from the         
somber black silk you wore to grandmother's funeral.  
               
You were the river current         
carrying the roaring notes                  
forming them into pictures of a little boy reclining         
a swallow flying                  
You were the caravan master at the reins         
driving your thread needle artillery across the mosaic                          
cloth bridges                  
delivering yourself in separate testimonies
                  
oh mother you plunged me sobbing and, laughing         
into our past                  
into the river crossing at five         
into the spinach fields         
into the plainview cotton rows         
into tuberculosis wards         
into braids and muslin dresses                  
sewn hard and taut to withstand the thrashings of             
twenty-five years
                  
stretched out they lay         
armed/ready/shouting/celebrating  
                
knotted with love
         
the quilts sing on                                                                                       
                  

Sunday, April 15, 2012

Amazing Teacher Gift

As the school year is winding down, I thought I'd share with you the most awesome gift I have ever received as a teacher. Last year a student and her mother made me a home-made cookie bouquet! It was the most thoughtful, original, and heart-warming gift I have ever received from a student. 


Here's How They Made It:

  • 1 block green floral foam
  • Wooden kabob skewers
  • Woven basket
  • Tissue paper
  • Plastic sandwich bags without zip closures
  • Multi-colored ribbon
  • Assorted, from scratch, hand decorated, sugar cookies 


They attached a hand written note of thanks and the recipe they used for the sugar cookies. They also made it a "Star" theme to express that I was a "Shining Star Teacher".  

By changing the cookie shape, this gift could be used for a variety of different occasions. It was an incredibly touching gift and could be used to show sincere thanks to anyone in your life. I know that I will never forget it and hope to create my own soon!

Additional themes could be:

  • Quilt blocks for a friend
  • Award Ribbons for an accomplishment
  • Hearts for love
  • Houses for house-warming
  • Sports equipment for good luck or celebrations
  • Baby bottles for a shower
  • Wedding cakes for a wedding or shower
  • Mickey faces for an upcoming trip or party
  • Diploma for graduation
  • Flip-Flops for summer
  • Keys or cars for a 16th Birthday


Any other ideas?


Saturday, April 14, 2012

A Gift From the Heart

MY HUSBAND MADE ME A QUILT!!!!!


My amazing husband pieced me a Ragtime style quilt my my birthday! 


According to him and my mom, he began working on the project months ago but could only work on it when I wasn't around. My sewing machine has been living at my parents house since a sewing weekend I had with my mom. Which means that in order to create this masterpiece he had to sneak over to my parents house to sew. He is the best husband EVER! God love him!!! 
And all this time I thought he was getting closer to his in-laws.

Monday, April 9, 2012

A Year Ago Today

A year ago today I married my best friend and 
the love of my life! 


We were given TWO absolutely gorgeous wedding quilts.
 

And a chalkboard for all of our guests to sign.

It was the happiest day of my life!!!

Sunday, April 8, 2012

Easter Table Topper

Happy Easter!


Heres a quick and easy table topper that you can whip up before the relatives arrive!


Just add rickrack to any two adorable Easter prints and you've got a stunning, Easter themed, centerpiece!


Monday, April 2, 2012

Children's Books About Quilts

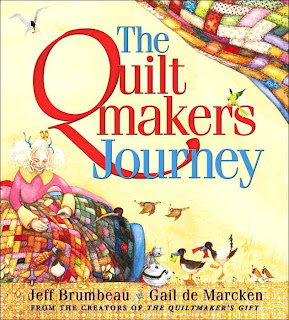
The teacher in me can never pass up a good children's book. If you want to share the gift of quilting with the children in your life I highly recommend these stories by Jeff Brumbeau and Gail de Marcken.


But you don't have to take my word for it. Check out this book review from an authority in the field. Enjoy and happy reading!!!

Sunday, April 1, 2012

Machine Quilting

  
As I mentioned before, I am an on-the-go quilter. I love sewing and quilting projects, but they usually have to be something I can accomplish quickly, or they tend to become UFOs (unfinished fabric objects).

Due to this, I have never quilted anything by hand. I have tried (unsuccessfully) and admire the amazing women who do, but I have learned that if I want something completed quickly, I have to have it machine quilted.

For this I go to Debbie's Country Quilting! David and Debbie started Debbie's Country Quilting several years ago and have made quite a name for themselves. They are the only machine quilters I entrust with my handy work and they make my quilts look amazing!!!!!

Here is some of the work they have done for me and my mom throughout the years!

My College Bed Quilt

My husband's flannel quilt
A Basket of Posies
Log Cabin Star
(the wedding quilt my mother made)

Double Wedding Ring
Pieced by Debbie and Quilted by David


Peppermint Patty Civil War
Intricate plumes and echoed hour glasses

Just look at all those beautiful stitches! Call or email Debbie's Country Quilting today and find out how they can make your masterpiece a work of art!


Thursday, March 29, 2012

Sewing Room Swag

Every sewing room needs it's own personal touches!


I painted this switch plate at a paint-your-own-pottery studio. 
It adds an extra bit of fun to my sewing room!


Just pick your favorite quilt block and let your imagination take over. 
Painting pottery is a great way to let your creativity shine through. 

It's fun for kids or a night out with friends!

Wednesday, March 28, 2012

App Attack

In the new iGeneration of today there seems to be an app for everything. So whether you enjoy shopping, shop hopping, designing, stitching, organizing or coupon "cutting".
I'm here to tell you that...

There's an app for that!

The following phone apps are just a few that I found useful or interesting. 
Plus they are all FREE!!!!


iSewingRoom is great for keeping track of all the fabric, patterns, notions and projects you have going.

QuiltCalc makes the best calculating companion for backing, batting, binding and borders, plus more.

QuiltFab is another calculating companion with many different features to explore.

Quilt Shops helps you locate all of the nearby quilt shops as you travel. PERFECT!!!!

Embroidery has a stitch reference guide and tutorials for all of you who love hand work.

QuiltRef gives dimensions and yardage needs for all bed sizes with or without a pillow tuck.

BlockFab assists you in designing your own quilt blocks and quilts.

Jo-Ann provides you with the latest coupons and the best sales. No paper ad needed to save.

Tuesday, March 27, 2012

Sewing Day Recipe

For those wonderful days when you are free to sew without interruption!

Coke Roast
3-4 lb. roast
12 oz. can of coke (not diet)
1 can Cream of Mushroom Soup
1 packet Beefy Onion Soup Mix

Place roast in crock pot. Pour soup mix and Coke around the roast making sure soup mix dissolves. Pour Mushroom Soup directly on top of roast to hold moisture. Cook covered for 4-5 hours at 300 degrees. Add veggies last hour and a half.

(Special thanks to my friend SKW for sharing!)

Did I Mention I Was a Teacher?

"To make your children capable of honesty is the 
beginning of education." -John Ruskin

An actual conversation I had today...

Student: (bouncing up to me) Mrs. T you're awesome!
Me: Well, thank you! You're pretty awesome yourself!
Student: When school first started I wasn't sure if you would be cool or not.
Me: Why is that?
Student: Well, you were young so I thought that was cool, but you told us you liked to quilt in your free time and I thought that made you sound like my grandma.
Me: Your grandma likes to quilt?
Student: Yeah. She does it all the time.
Me: (Smiling) Sounds like my kind of fun!
Student: (with confused look) How old are you again?
Me: 25
Student: (shaking head) I don't get it?
Me: Get what?
Student: How you can be so cool and act so old at the same time. You need to get out more.

I burst out laughing on the spot! I love my job! Kids are so stinkin' honest and funny!


Monday, March 26, 2012

A New Twist on Barn Quilts

The origin of the Barn Quilt dates back 300 years ago to a time when German immigrants journeyed to America in search of religious freedom.
Link: Fairmont Sentinal
Link: Colonial Quilt Square and Modern Quilt Squares

The over sized Barn Quilt squares we see today are attributed to a woman named Donna Sue Groves from West Virginia.
Link: Today's Barn Square

Today, barns all over the United States boast beautiful over sized quilt squares. There are tours, festivals and drives all celebrating these captivating expressions of art.


In my recent research, I found a lady who has taken this idea one step further. Lynn is a veteran quilter and crafter who loves taking ideas and adding her own twist.

"I don't have a barn, but I love the elegance and beauty of barn quilts" says Lynn, "so I made my own versions."

Lynn lives on a lake and decided that if a barn can have a quilt, why not a  boat dock?


She also paints a mini version to fit in a sewing room or any room.


Lynn sells these Quilt Squares and will customize them with any colors, sizes or patterns the buyer prefers. E-mail me if you have any questions or are interested in these products.

Sunday, March 25, 2012

My First Quilt

I started quilting at a young age. My mother was a quilter and had been since college. I don't really remember a time when she didn't want to stop at quilt shops or run to her sewing machine with a project.


The first quilt I ever "made" from start to finish was a small Log Cabin lap quilt. My mom had signed us up for a Mother/Daughter Quilt Class and she was thrilled! The daughters were told that our mom's would be our "servants for the day" and we thought that was the best thing ever! We had a wonderful time and I still have the quilt as a reminder of that day and those memories. It was a GREAT Day!